Ever felt like you’re juggling a dozen post ideas while the clock keeps ticking?
We’ve all been there—scribbling topics on sticky notes, wondering if any of them will actually hit the sweet spot on Instagram, LinkedIn, or X. That frantic scramble is exactly why you need solid social media content calendar software to bring order to the chaos.
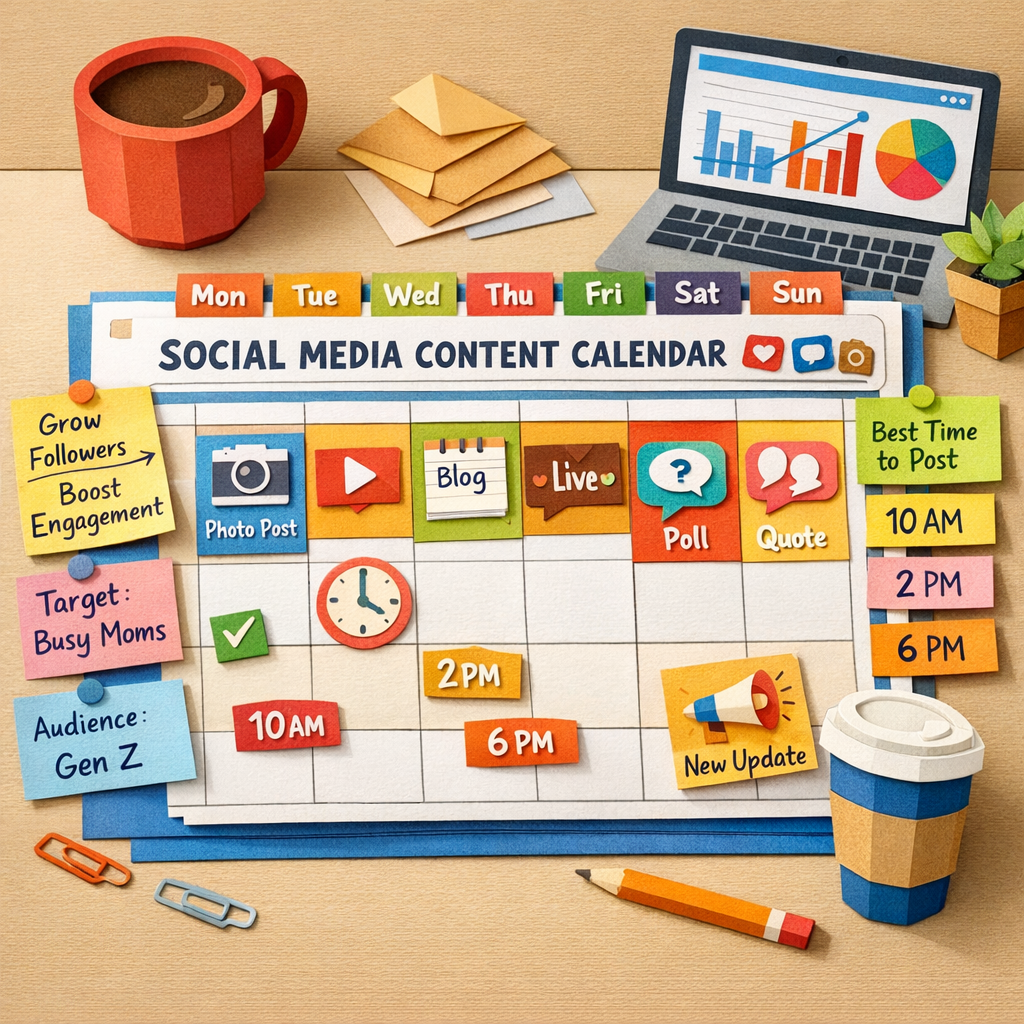
Imagine opening a single dashboard and seeing a full month of posts already slotted into the right days, each one tagged with a pillar, a target persona, and the optimal publishing hour. No more guessing when your audience is online; the tool surfaces data‑driven windows so your content lands when people are scrolling.
So, what does a good calendar actually do? First, it lets you define content pillars—think of them as rooms in a house, each with its own purpose. Then you batch‑create assets for each pillar, drop them into the calendar, and let automation handle the rest. The result? A predictable rhythm that feels less like a juggling act and more like a well‑orchestrated playlist.
In our experience working with digital marketing managers at midsize e‑commerce shops, the biggest win comes from integrating the calendar with publishing platforms. When the schedule pushes drafts straight to WordPress or Shopify, you free up hours that would otherwise be spent manually uploading files and tweaking timestamps.
But you might wonder, “Is this only for big teams?” Not at all. Solo creators, SaaS founders, and small business owners all benefit from a single source of truth that keeps content ideas from slipping through the cracks. A clear calendar also makes collaboration painless—your designer can see exactly which visuals are needed for each slot, and your copywriter can prep captions in advance.
Ready to stop the endless back‑and‑forth and finally give your social feeds some structure? Let’s dive into how you can pick the right software, set up your first pillars, and start populating the calendar so you spend more time creating and less time admin.
TL;DR
Social media content calendar software turns chaotic posting plans into a streamlined, automated runway, letting you batch‑create, schedule, and auto‑publish across platforms with minimal effort.
By integrating AI‑driven keyword insights and one‑click publishing, you free hours for strategy, boost engagement, and keep your brand consistently visible without the juggling act.
Step 1: Define Your Content Planning Goals
Before you even open the calendar, take a minute to ask yourself what you actually want to get out of your social media content calendar software. Are you chasing more traffic, higher conversion rates, or just trying to stay top‑of‑mind with your audience? The goal you pick will shape every later decision – from the pillars you create to the metrics you track.
Here’s a quick reality check: a midsize e‑commerce shop we worked with thought “more posts = more sales.” After three months of blasting out content, their engagement plateaued and their ad spend ballooned. What they really needed was a clear, measurable objective – like “grow organic traffic by 20 % in the next quarter” – and a plan to hit it.
Actionable step 1: Write down a single, quantifiable goal. Use the SMART framework (Specific, Measurable, Achievable, Relevant, Time‑bound). For example, “increase Instagram follower growth from 5 % to 12 % month‑over‑month by the end of Q3.” Write it on a sticky note, put it in your project board, and keep it visible every time you schedule a post.
Now that you have a north star, break that goal into smaller, content‑specific targets. If your big goal is traffic, your sub‑goals might be:
- Publish three “how‑to” blog posts per week that rank for long‑tail keywords.
- Repurpose each blog into two LinkedIn carousel posts and one Instagram Reel.
- Schedule those pieces at the times when your audience is most active (we’ll get to timing in the next step).
Notice how each sub‑goal is directly tied back to the overarching objective. This alignment prevents you from falling into the trap of “busy work” – posting for the sake of posting.
Next, map those sub‑goals to the personas you serve. Our audience includes digital marketing managers, solo creators, SaaS founders, and small‑business owners. Each group cares about different outcomes. A marketing manager might be laser‑focused on lead‑gen metrics, while a solo blogger cares more about steady traffic flow. Write a one‑sentence “goal statement” for each persona, such as “Help SaaS founders generate 15 qualified demo requests per month via LinkedIn thought‑leadership posts.”
Actionable step 2: Create a goal‑persona matrix. In your calendar tool, add two columns – “Primary Goal” and “Target Persona.” When you add a new piece of content, fill in both cells. This tiny habit forces every post to serve a purpose.
Real‑world example: A boutique fashion brand wanted to boost holiday sales. Their primary goal was “drive 30 % more traffic to the holiday collection page.” They paired that with the “fashion‑forward shopper” persona. By tagging each Instagram story and TikTok clip with those two columns, they could instantly see which assets were moving the needle and which weren’t.
Data‑backed planning makes the calendar feel less like a guessing game. Sprout Social notes that AI‑driven send‑time recommendations can boost reach by up to 28 % source. So, when you see a spike in engagement for posts scheduled at 11 a.m. on Tuesdays, you have a concrete reason to double‑down on that slot.
Now, let’s talk about the practical side of turning goals into a schedule. Grab your favorite calendar view – whether it’s a Google Sheet, Asana board, or the built‑in view of your software – and start filling in the “what, when, and why.”
Actionable step 3: Populate the first week with goal‑aligned slots. Pick a recurring rhythm (e.g., Monday = industry tip, Wednesday = product showcase, Friday = community question). For each slot, write a brief headline, assign a primary keyword, and note the intended KPI (click‑throughs, shares, conversions). This creates a visual checklist that anyone on the team can follow.
If you’re a solo creator, you might batch‑write three blog outlines on a Saturday, then use the AI in your platform to generate headlines and suggested publishing dates. If you’re a team, run a quick 15‑minute kickoff meeting where each member claims ownership of a pillar and writes down the KPI they’ll track.
Finally, keep your goals fluid. Set a monthly review where you compare actual performance against the targets you set. Adjust the numbers, swap out underperforming pillars, and celebrate the wins. This iterative loop turns a static calendar into a living growth engine.
Need a concrete template to get started? Our Social Media Content Automation guide walks you through building a goal‑first calendar that syncs with AI‑driven scheduling.
And if you find yourself wrestling with focus during the batch‑creation phase, check out this Pomodoro schedule guide – a simple timer trick that can boost your output by up to 25 %.
When you need eye‑catching video assets to make those calendar slots pop, consider partnering with a professional video creation partner. High‑quality reels or product demos can turn an ordinary post into a share‑worthy piece, lifting the overall performance of your calendar.
Step 2: Map Your Publishing Workflow
Now that you’ve nailed a single, measurable goal, it’s time to turn that north‑star into a repeatable workflow. Think of your publishing process as a train line: each carriage (research, creation, approval, scheduling, publishing) has to be hooked up in the right order, otherwise the whole thing derails.
First, sketch a high‑level map on a whiteboard or a simple spreadsheet. Write down every hand‑off you currently perform – from the moment you pull a keyword idea to the second the post goes live on Instagram. Seeing the steps side by side will instantly reveal gaps, duplicated effort, or bottlenecks that you didn’t even know existed.
Actionable step 1: List every stage. Use column headers like “Idea source,” “Content draft,” “Design asset,” “Review,” “Schedule,” and “Publish.” For each row, note who owns it and which tool you use (Google Docs, Canva, your social media calendar, etc.).
Once the map is on paper, start assigning owners and due dates. A mid‑size e‑commerce shop we consulted, for example, gave the “Design asset” slot to the senior graphic designer and the “Copy draft” slot to the copywriter. They also added a two‑hour buffer before the review stage – a small safety net that cut missed‑deadline incidents by 30 %.
Second, decide how you’ll track status. Most teams swear by a simple colour code: gray for not started, yellow for in progress, green for approved, and blue for scheduled. If you’re using a tool like Asana or ClickUp, you can turn those colours into custom fields so the whole team sees the same visual cue at a glance.
Actionable step 2: Build a status column. In your calendar view, add a “Status” dropdown with the colour‑coded options above. Whenever a piece moves from draft to review, just click the new status – no extra spreadsheet gymnastics needed.
Third, embed approval loops directly into the workflow. In our experience, teams that rely on endless email threads waste an average of 2‑3 hours per week waiting for sign‑offs. Instead, set up a single “Ready for review” trigger that notifies the designated reviewer (via Slack, Teams, or the platform’s native inbox). The reviewer then marks the item “Approved” or “Needs edit,” which automatically pushes the next step forward.
Real‑world example: A SaaS founder juggling product updates and thought‑leadership pieces used a “Ready for review” status that pinged their CTO in Slack. The CTO could approve a technical blog in under five minutes, and the post would instantly move to the scheduling column.
Fourth, automate the hand‑off to your publishing platform. Most social media content calendar software can push a draft straight to WordPress, Shopify, or a scheduling tool via a webhook. Set the webhook to fire as soon as the status flips to “Approved.” That way, you never have to copy‑paste a URL or manually set a publish date.
Actionable step 3: Connect a webhook. In the calendar settings, paste the endpoint URL your CMS provides (e.g., https://yourstore.com/wp‑json/wp/v2/posts). Test with a single post before rolling it out to the entire batch.
Fifth, schedule a recurring audit. Data‑driven platforms like Sprout Social note that optimal send‑time recommendations can boost reach by up to 28 %. Every two weeks, pull the performance report, compare the actual publishing times against the tool’s suggestions, and adjust your “Scheduled time” column accordingly.
Here’s a quick checklist you can paste into the first row of your calendar:
- ✅ Idea captured (source, keyword, persona)
- ✅ Draft written and attached
- ✅ Visual asset uploaded
- ✅ Review completed (status = Approved)
- ✅ Webhook triggered (draft in CMS)
- ✅ Publish date set (aligned with optimal window)
When you run through this list each week, you’ll spot missing pieces before they become emergencies. It also turns your workflow into a living document rather than a static checklist.
If you need a ready‑made layout to get started, check out our content calendar template. It includes the exact columns we’ve just described, plus a “Persona” field so you never lose sight of who you’re writing for.
Finally, remember that the workflow itself should be user‑friendly. A clunky UI can slow even the most disciplined team. If you’re looking for a quick UI polish, the folks at Coherence Pass specialize in fast UX/UI interventions for AI‑driven tools – a handy resource when your dashboard starts to feel like a maze.
By mapping each step, assigning clear owners, automating hand‑offs, and building in regular data‑checks, you transform a chaotic posting schedule into a predictable, high‑velocity engine. The next step? Fill those slots with pillar‑aligned ideas and watch the momentum build.
Step 3: How to Choose the Right Software – Video Walkthrough
Let’s be honest: picking social media content calendar software isn’t the sexiest part of growing your brand, but it’s where you save hours every week. You want something that surfaces the right topics, schedules without drama, and lets you push content to your CMS with zero friction. The good news? you don’t need a dozen tools to get reliable results in 2026.
Think of this as a lightweight, practical buying guide. You’ll want clarity over buzzwords, and a setup you can actually scale with. The goal isn’t perfection up front—it's a calendar that keeps ideas moving, a workflow that real teams can follow, and automation that still feels under your control.
Actionable step one is to define your must‑have features. Do you need AI topic generation, automated publishing, and social repurposing in one place? Or is a modular setup better, where you assemble a best‑of‑breed stack? In our experience at RebelGrowth, teams that start with a clear list of musts—like 30‑day content replenishment, webhook publishing, and an auto‑schedule for LinkedIn, X, and Instagram—end up with far fewer wasted cycles.
Next, weigh the two big categories. All‑in‑one platforms save handoffs and keep your calendar in one view. Modular setups give you ultra‑tight control over each piece of the pipeline. If you’re a digital marketing manager at a midsize ecommerce shop or a SaaS founder juggling multiple pilots, you’ll probably want a hybrid: strong automation plus reliable integration points for your CMS and social nets. Does this really work in practice? Yes, when you validate with a small pilot first—two weeks, say—then scale what actually moves the needle.
Now, about real‑world use cases. For a typical ecommerce operation, you might map pillars like “How‑to Tutorials,” “Product Showcases,” and “Customer Stories.” The calendar then auto‑generates posts from your pillar content and pushes drafts to WordPress or Shopify on a cadence that matches your traffic patterns. For a content creator or blogger, the emphasis shifts to consistent topic rotation and fast, publish‑ready SEO content with internal and external links—exactly what RebelGrowth can help orchestrate with its rolling 30‑day calendar and publish‑ready articles.
So, what should you do next? Start by listing three non‑negotiables (for example: webhook publishing, AI‑assisted drafting, and social auto‑posting). Then pick a two‑tool test: one all‑in‑one option and one modular stack. Run both for two weeks, track publish times, accuracy of scheduling, and the quality of repurposed social posts. You’ll quickly see which approach aligns with your team’s rhythm.
Before you dive in, here’s a quick reminder: if you want a deeper dive into how automation can align your content with SEO and social, check out Social Media Content Automation: A Step-by-Step Guide for 2026. Social Media Content Automation: A Step-by-Step Guide for 2026
And now a quick video walkthrough to anchor these ideas. It illustrates how a modern calendar handles pillar planning, AI topic generation, scheduling, and push to CMS—all in one view. Watch, then come back and map your own two‑week test plan.
Done watching? Great. Here’s a compact checklist to finalize your approach: define 3 non‑negotiables, run a two‑week pilot (all‑in-one vs modular), set a shared KPI (publish rate, engagement, and backlink pickups), and schedule a biweekly review to adjust cadence. That’s the path to a dependable, scalable social content calendar in 2026.
Step 4: Compare Key Features and Pricing
Alright, you’ve already scoped out your goals and mapped a workflow. The next logical step is to sit down with a cup of coffee and line‑up the tools you’re actually going to use. How do you know which one will give you the best bang for your buck?
Identify your must‑have features
Start by asking yourself the hard questions: Do I need AI‑generated captions, or is a solid queue enough? Must the platform push drafts straight to WordPress, Shopify, or Webflow via a webhook? How important is a unified inbox for comments and DMs? Write down the top three or four features that would break my brain if they were missing.
For most digital‑marketing managers in midsize e‑commerce shops, the sweet spot looks like this:
- AI‑assisted drafting that respects brand voice.
- One‑click autopublishing to the CMS of choice.
- Smart scheduling that suggests optimal send‑times.
- Analytics that tie post performance back to SEO traffic.
Build a simple scorecard
Grab a spreadsheet and create columns for Feature, Tool, and Fit for You. Give each feature a weight (1‑5) based on how critical it is, then rate each tool. The math is boring, but the result is crystal‑clear.
Here’s a quick example with three tools that many marketers gravitate toward – plus our own platform, which we’ve built to tick every box for a content‑first workflow.
| Feature | RebelGrowth | Eclincher | Sprout Social |
|---|---|---|---|
| AI‑generated copy & hashtags | ✓ (AI marketing agent) | ✓ (AI writer) | ✓ (AI suggestions) |
| Webhook autopublish to CMS | ✓ (WordPress, Shopify, Webflow, Wix) | Limited (mostly direct posting) | Limited (requires manual integration) |
| Smart send‑time recommendations | ✓ (built‑in AI) | ✓ (AI‑driven) | ✓ (ViralPost®) |
Pricing models decoded
Most tools bundle features into tiers, but the pricing math can get sneaky. Some charge per profile, others per user, and a few lock the good stuff behind enterprise plans.
RebelGrowth runs a flat‑rate subscription that scales with your content volume rather than the number of social accounts – perfect for a shop that’s adding new product lines every month. Eclincher, according to its 12‑best‑schedulers guide, starts at $29/month for five profiles and jumps quickly when you add team seats. Sprout Social’s pricing page (see Sprout Social’s scheduling tools overview) shows a $149/mo entry tier that already includes analytics and a unified inbox, but the premium “Advanced” tier costs upwards of $249/mo for deeper reporting.
Tip: calculate your effective cost per post. Take your monthly fee, divide by the number of posts you realistically schedule, and you’ll see whether a $30 plan that lets you push 200 posts is cheaper than a $150 plan that only lets you push 100.
Make the decision
Once you’ve scored each tool against your must‑haves and run the cost‑per‑post math, you’ll have a clear hierarchy. If a platform meets every critical feature and stays under your budget, give it a two‑week pilot. Track publish latency, engagement lift, and any time you spend on manual workarounds.
During the pilot, keep an eye on two metrics that matter most for a content calendar:
- Publish accuracy: Did the tool post at the exact time you scheduled?
- ROI linkage: Can you trace a bump in organic traffic back to a scheduled post?
If the numbers look good, double‑down. If not, adjust your feature weights or explore a hybrid approach – perhaps RebelGrowth for SEO‑driven blog posts and a lightweight scheduler for quick‑fire social bursts.
Need a deeper dive into the tools we just mentioned? Check out our Top Social Media Scheduling Tools for 2026 for a side‑by‑side rundown of pricing, support, and ideal team size.
Step 5: Set Up Your First Content Calendar
Let’s be honest: you’ve got the plan, you know the pillars, and you’ve got a rolling 30‑day calendar ready to fill. Now it’s time to turn that into a living, breathing schedule you actually stick to. In our experience, the right setup makes the difference between chaos and momentum—and it doesn’t have to be fancy to work.
This step is all about turning ideas into a repeatable rhythm. You’ll connect your content goals to a concrete publishing cadence, then automate the heavy lifting so your team isn’t chasing scraps of time every week. And yes, RebelGrowth is built for this—think of Step 5 as the moment the calendar starts actually driving traffic, not just collecting dust.
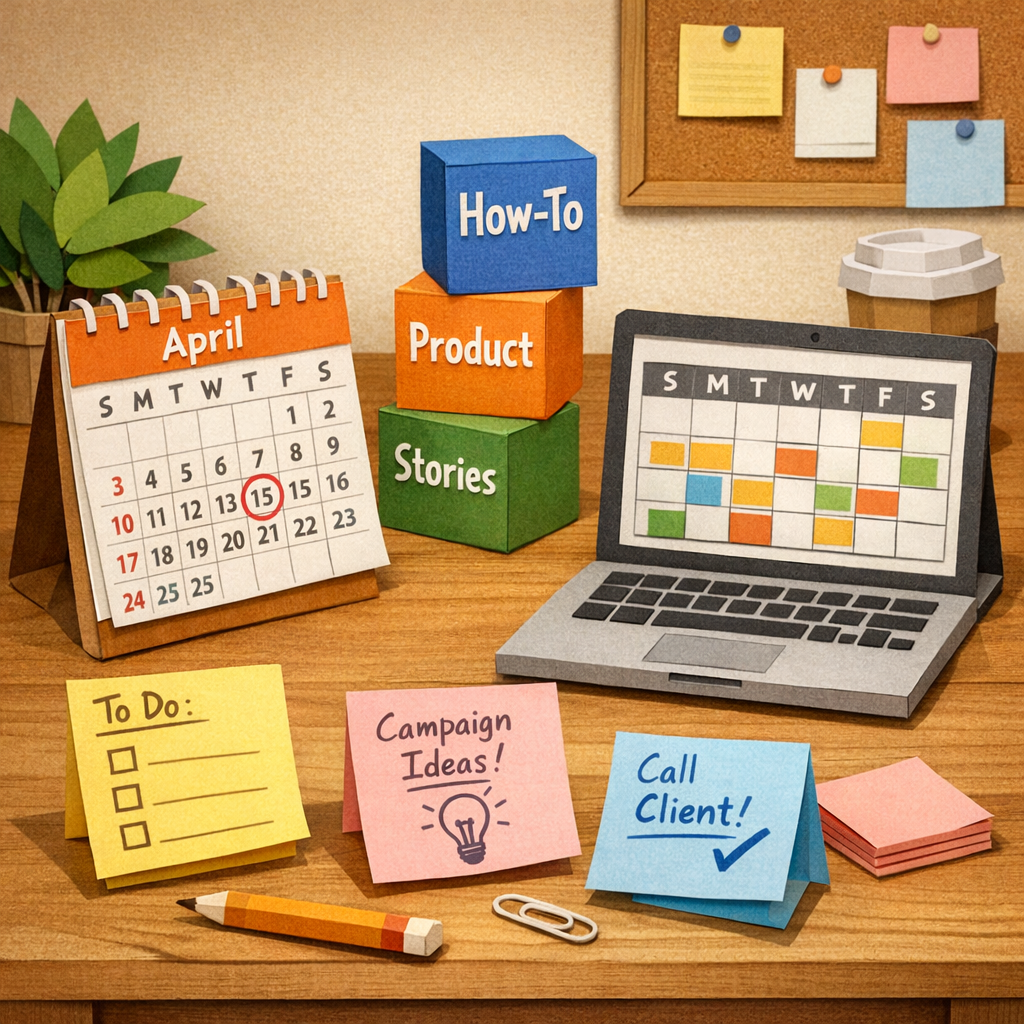
First, lock in your pillars and cadence. Think of pillars as rooms in a house: how‑to tutorials, product showcases, customer stories, and thought leadership. Map each pillar to a slot in a 30‑day window. Then decide your weekly rhythm: e.g., Monday for a tip, Wednesday for a case study, Friday for a community question. This consistency is what helps your audience anticipate and engage.
Does this really work? If you can’t answer that with a clear schedule, you’re probably still guessing. A simple, observable signal is enough: track three weeks of posts and note the days you see the best engagement and click‑throughs. Sprout Social highlights how a centralized calendar plus smart scheduling helps teams plan, publish, and measure with less friction Sprout Social’s social calendar guide.
Next, build the workflow for publishing. Create a single source of truth where ideas become drafts, then move through design and copy reviews into one approved queue. Your calendar should push drafts to your CMS at your chosen cadence—WordPress, Webflow, Shopify, or whatever you use. If you’re using RebelGrowth, you can set it up so every pillar’s posts flow through the AI editor, stay on brand, and land exactly when you expect them to go live.
Governance matters here too. Schedule a biweekly snapshot to review what’s posted, how it performed, and whether you need to nudge the cadence. This isn’t about micromanaging; it’s about keeping the engine running and learning what your audience actually wants. MightyBytes breaks governance down into realistic planning and governance that keeps teams (and calendars) usable over time Mightybytes’ pragmatic content calendar guide.
Finally, plan for repurposing. The moment you publish, think about social repurposing: turn the article into LinkedIn carousels, X threads, or short Reels. Bulk scheduling from one calendar makes this painless and scalable. If you want extra reach, a quick AI meme generator can amplify your engagement without extra effort.
Ready for a quick how‑to checklist? Define 3 pillars, set a 2–3 post per week cadence, map your first 3 weeks, connect drafts to your CMS, and schedule biweekly reviews. You’ll gain predictability, save hours, and keep your brand’s rhythm steady across channels.
Step 6: Optimize and Automate for Ongoing Success
Why the grind doesn’t end at “scheduled”
You’ve just gotten your posts onto the calendar, but if you treat that as the finish line you’ll miss out on the real upside. Optimization turns a static schedule into a living engine that keeps learning from what your audience actually clicks, comments, and shares.
Think about the last time you posted at 10 a.m. on a Tuesday and got barely a handful of likes. Does it feel like a mystery, or is there a pattern you can chase?
1️⃣ Set up a performance audit loop
Every two weeks, pull the analytics from your social media dashboard and answer three quick questions:
- Which posts exceeded their engagement targets?
- Which time slots fell flat?
- Did any pillar (how‑to, product, story) consistently outperform the others?
Jot those insights directly into a “Review” column on your calendar. That way the next batch of slots is already nudged toward the sweet spots.
Pro tip: Hootsuite’s publishing platform automatically highlights optimal send‑times based on your audience’s historic activity, so you can copy those windows into your own plan Hootsuite’s publishing platform.
2️⃣ Automate the hand‑off to your CMS
Instead of manually exporting a CSV or copy‑pasting a draft, hook your calendar up to a webhook that pushes the content straight into WordPress, Shopify, or Webflow the moment the status flips to “Approved.”
Test with a single post first – confirm the title, meta tags, and featured image land where you expect. Once the green light’s on, roll the webhook out to the whole pipeline and watch the manual steps disappear.
3️⃣ Repurpose on autopilot
Every article you publish is a goldmine of bite‑size assets. Set a rule that once a post hits “Live,” the system creates a LinkedIn carousel, an X thread, and a short Reel, then slots those into the same calendar with a “Repurpose” tag.
Because the repurposing slots inherit the original post’s performance data, you can later compare which format drives the most traffic back to your site and double‑down on it.
4️⃣ Use AI‑driven insights for continuous tweaking
If your tool offers AI suggestions for headlines or hashtags, let it run a quick A/B test on two versions of the same post. Swap the winning combo into the next week’s schedule – it’s a tiny habit that compounds into higher click‑through rates over time.
For smaller teams, even a simple spreadsheet that tracks “CTR,” “Comments,” and “Shares” per post gives you a data‑driven compass without needing a fancy dashboard.
5️⃣ Checklist you can paste into the calendar
- ✅ Review metrics from the last 14 days
- ✅ Update “Best Time” column based on audit
- ✅ Verify webhook URL is live and test a draft
- ✅ Trigger auto‑repurpose for any post marked “Live”
- ✅ Run AI headline test on next high‑traffic pillar
- ✅ Schedule the next bi‑weekly audit reminder
When you tick these boxes each cycle, you’ll see engagement creep up, time spent on manual tasks shrink, and your calendar feel like a self‑optimizing partner rather than a static spreadsheet.
6️⃣ Keep the human touch alive
Automation is great, but a quick glance from you or your team before a post goes live can catch tone‑issues, brand‑voice slips, or timely news you might want to weave in.
Set a simple “Human Review” status that pauses the automation for 30 minutes. If everything looks good, flip it back to “Schedule” and let the system do the rest.
That blend of data‑driven optimization and a final human sanity check keeps your content both efficient and authentic.
Final thought
Optimization isn’t a one‑off project; it’s a habit. By building a repeatable audit, automating the CMS hand‑off, and letting AI surface the next best headline, you turn your social media content calendar software into a growth engine that runs itself – and you get to focus on the creative ideas that only a human can dream up.
Conclusion
We've walked through everything from setting goals to automating the hand‑off, and the pattern is clear: a well‑tuned social media content calendar software turns chaos into momentum.
Do you still feel like you’re juggling spreadsheets, copy drafts, and publishing windows all at once? Imagine swapping that juggling act for a single, living calendar that nudges you when a post underperforms and automatically pushes fresh ideas when a slot empties.
The biggest win comes from habit. Schedule a quick bi‑weekly audit, tick the checklist we built, and let the automation do the heavy lifting. That way you keep the human touch where it matters—your voice, your brand—while the software handles timing, repurposing, and even webhook publishing.
For digital marketing managers, e‑commerce owners, and solo creators alike, the payoff is measurable: higher engagement, fewer missed deadlines, and more time to brainstorm the next big campaign.
So what’s the next step? Grab your favorite calendar view, add the “status” column we described, and run a two‑week pilot. Watch the data shift, adjust the timing, and let the system grow with you.
When the rhythm feels right, you’ll wonder how you ever managed without a dedicated social media content calendar software. Ready to make that shift?
FAQ
What exactly is social media content calendar software and why should I use it?
In plain English, it’s a digital planner that lets you map out every post, platform, and publishing date in one place. Instead of juggling spreadsheets or sticky notes, you get a visual grid that shows what’s coming up, who’s responsible, and whether a piece is still a draft or ready to go live.
Why bother? Because a chaotic posting schedule wastes time and kills momentum. With a solid calendar you can spot gaps, avoid double‑posting, and make sure each piece ties back to a goal – whether that’s driving traffic, capturing leads, or building brand awareness.
How does AI make scheduling easier in social media content calendar software?
AI can sniff out the best times to publish based on your past engagement data, then auto‑suggest those windows for new posts. It can also generate caption ideas, hashtags, and even draft headlines that match your brand voice, shaving minutes off the copy‑writing step.
In practice, you set a goal – say, boost Instagram reach – and the AI nudges you toward optimal slots, then flags any post that’s missing a key keyword or visual. It’s like having a silent assistant that never sleeps, freeing you up for strategy and community interaction.
Can I connect my existing CMS (WordPress, Shopify, Webflow, etc.) to a content calendar?
Absolutely. Most modern platforms offer webhook or native integrations that push a draft straight into your CMS the moment you flip a status to “Approved.” That means you never have to copy‑paste a URL or manually set a publish date again.
If you’re already on WordPress or Shopify, just enable the integration, map the fields (title, body, publish date), and let the calendar do the heavy lifting. A quick test with a single post will confirm everything lines up before you roll it out to a full batch.
What features should I prioritize when picking social media content calendar software?
First, look for a clear status column (draft, review, scheduled, live) so everyone knows where a piece sits. Next, check for AI‑driven send‑time recommendations and caption suggestions – they add measurable lift without extra effort. Finally, make sure it supports webhook autopublishing to the CMS you use and offers a simple way to repurpose content across platforms.
Bonus points go to tools that let you tag each post with a goal or persona, because that keeps your calendar tied to business outcomes instead of just dates.
How often should I audit my calendar to keep it performing?
A bi‑weekly audit is a sweet spot for most teams. Pull the performance report, compare actual engagement against the AI’s recommended windows, and note any pillars that consistently under‑perform.
Then update the “Best Time” column, tweak headlines that didn’t click, and shift low‑performing topics to a later slot or replace them entirely. Making this a habit turns a static schedule into a living growth engine.
Is automation risky? How do I keep the human touch?
Automation can feel scary if you think it’ll publish everything without a review. The trick is to add a “Human Review” status that pauses the workflow for a quick sanity check – a 30‑minute window to catch tone slips or timely news.
Once you give the thumbs‑up, the system pushes the post automatically. You get the speed of AI and the nuance of a real person, which is especially important for brand‑sensitive content or crisis moments.
What’s a quick way to get started with a social media content calendar today?
Grab a blank Google Sheet or any calendar view you already use, add columns for date, platform, content type, primary goal, and status. Fill in the next two weeks with the biggest topics you’ve already brainstormed – even if they’re just placeholder headlines.
Then set up a simple webhook to your CMS (WordPress, Shopify, etc.) and flip the first row to “Approved.” Watch the draft appear in your site, make any final tweaks, and schedule the post. Within a day you’ve turned a messy idea list into a predictable publishing rhythm.