Automating internal linking can shave hours off your blog workflow.
Most digital marketing managers spend the bulk of their week hunting for the right place to drop a link. Miss a link, and a page loses juice; add it wrong, and readers get confused. The result? Lost traffic and wasted time.
What if a tool could scan each new post, spot the best anchor text, and insert a contextual link without you lifting a finger? That's the promise of AI‑driven internal linking. A step‑by‑step guide to internal linking automation shows how the process works from start to finish.
Imagine you just published a tutorial on “DIY email newsletters.” The system instantly links the phrase “email list growth” to your evergreen guide on list building, and “subject line tips” to a case study you wrote last month. No manual copy‑pasting, no broken URLs.
Here’s a quick checklist you can copy today:
- Set a rule: link any mention of “keyword research” to your pillar post.
- Run the AI scan after each draft is saved.
- Review the suggested links in the editor before publishing.
For readers who want to boost traffic even faster, pairing strong organic structure with paid reach works well. Check out the Google Ads agency for tradies and service businesses to add a paid layer to your growth plan.
You’ll also free up time to create fresh content, not chase links. Over weeks you’ll see your site authority rise as search bots follow the smoother path you built.
Step 1: Audit Existing Content and Identify Linking Opportunities
Before you can let any automation run, you have to know what you’re working with. Grab a spreadsheet or a simple Google Sheet and list every blog post, its URL, and its primary keyword.
Pull a Crawl Report
Run a site crawl with a tool that reads your CMS, many managers like LinkStorm or Screaming Frog do this for free. The report will flag pages with zero inbound links (orphan pages) and those that sit deep in the site tree.
Find Natural Anchor Opportunities
Read through the titles and first paragraphs of each piece. Look for phrases that match the topics of other posts. For example, a guide on “email list growth” can naturally link to a pillar on “lead magnet ideas.”
When you spot a match, note the exact anchor text you’d use and the URL you want to point to. This tiny notebook will become the rule set for your automation.
Tip: Many AI-driven platforms let you upload a CSV of anchor-URL pairs and then sprinkle them into new drafts automatically. For a deeper dive, see How AI is Revolutionizing Internal Linking Automation for SEO for a walk-through of setting up those rules.
After the video, take a moment to scan the crawl output for any pages that have no outbound links at all. Add a simple “Related posts” block at the end of those articles, it’s a quick win that boosts link equity without extra writing.

Finally, turn your notebook into a rule list: keyword → target URL, anchor text → exact phrase. Save it in your CMS or feed it to your AI linking tool. With this solid audit in place, the automation you’ll set up later will have the right pages to link and the right words to use.
Step 2: Set Up Automated Linking Rules with Plugins or Scripts
Now that you have a list of anchor‑URL pairs, it’s time to tell the system when and where to drop each link.
Step 1: Pick a plugin or script that works with your CMS. WordPress users often reach for Link Whisper or Internal Link Juicer, while a custom Python script can run on any platform. Both options let you feed a CSV of rules and let the tool scan new drafts automatically.
Step 2: Create a rule file. In a spreadsheet, add three columns – keyword, target URL, and anchor text. Export it as CSV. Most plugins let you import that file straight into their dashboard. A script will read the CSV and call the CMS API to insert links.
Step 3: Define the trigger. For plugins, set the “on save” hook so the link check runs every time you hit Publish. For a script, schedule a cron job that runs after each new post is created. This way you never have to remember to run the tool manually.
Step 4: Test a few posts. Write a draft that includes the keyword “email list growth”. Save it and watch the plugin auto‑link to your pillar guide. If the link appears in the right place and uses the exact anchor you set, you’re good to go.
Tip: Keep the rule list lean. Too many keywords can cause over‑linking, which hurts readability. Aim for one or two links per post unless you have a very long piece.
If you want a quick start, check out How an AI Internal Linking Tool Streamlines Your Website’s SEO Strategy for a walkthrough of rule creation and plugin setup.
Finally, run a site crawl (Screaming Frog, LinkStorm, or the free Google Search Console report) to spot any missed spots. Add them to your CSV and let the automation fill the gaps. With the rules in place, every new blog post will automatically weave in the right internal links, saving you hours each week.
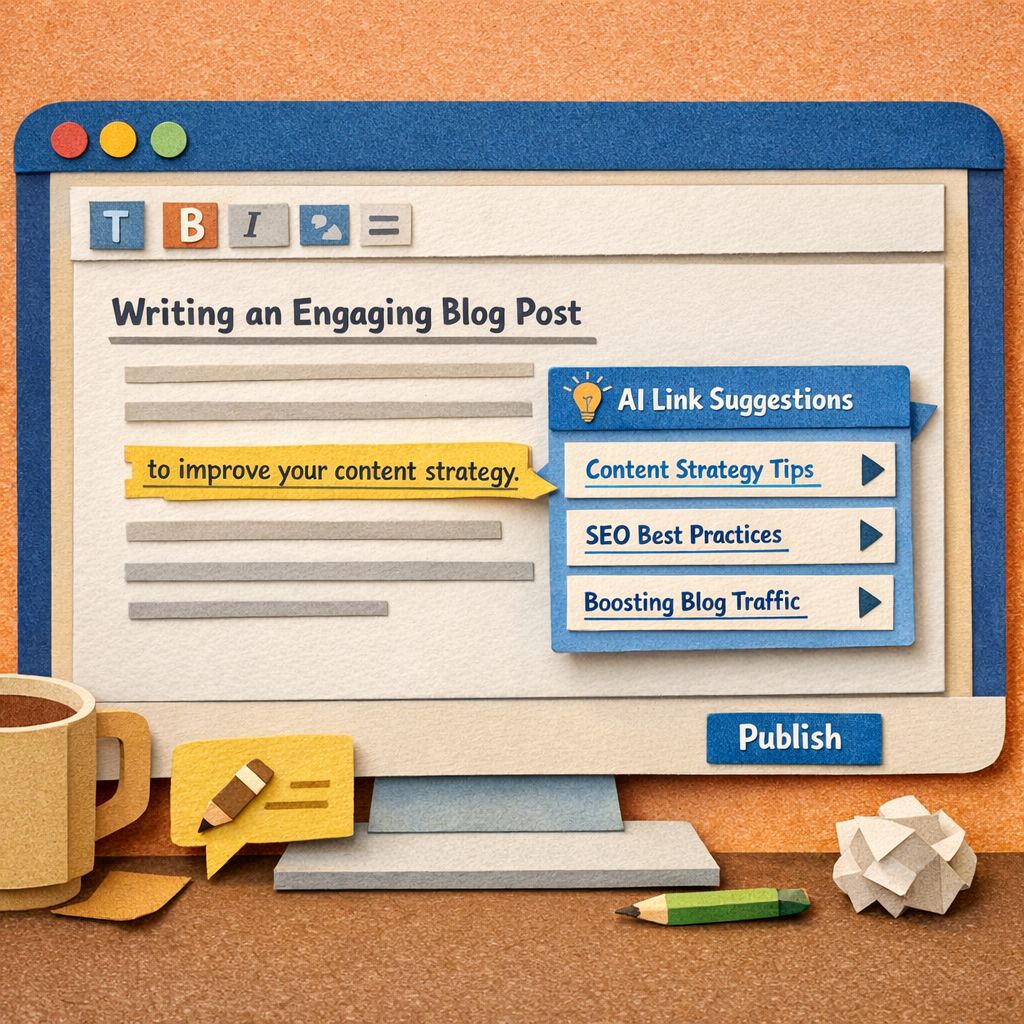
Step 3: Implement Contextual Linking Using AI‑Generated Suggestions
Now that your rule file is live, it's time to let the AI do the heavy lifting.
Turn on AI suggestions in your editor
Most plugins add a little panel right inside the post editor. Flip the switch, and the tool will scan the draft the moment you hit save.
When the scan finishes, a list of suggested links pops up. Each suggestion shows the exact phrase to link and the target page.
What if the AI could pick the perfect spot for you, every time?
Review and fine‑tune the suggestions
Take a quick look. Does the anchor sound natural? Does the linked page truly add value? If something feels off, just click “reject” and the AI learns from that choice.
Because the AI watches your past approvals, it gets better with each post. That means fewer false matches and more useful links.
Insert the links with one click
When you’re happy, hit the “add all” button. The plugin drops the HTML tags right where the anchor lives. No copy‑paste, no broken URLs.
Tip: Keep the number of auto‑links low, one or two per post keeps the copy readable and the link juice strong.
For a deeper dive into how AI can suggest links as you write, check out this guide on an AI internal linking tool AI internal linking tool. It walks through the same workflow with screenshots.
If you prefer a quick, chat‑based method, the repeatdigital article shows how to feed your draft and a list of URLs to ChatGPT ChatGPT for internal links. The same idea applies, let the model suggest places, then you approve.
Once the links are live, run another crawl to make sure nothing broke. Your site now weaves new posts into the existing content web without you lifting a finger.
Step 4: Monitor, Refine, and Scale Your Internal Linking Strategy
Now the links are live, you need to watch them work.
Start with a quick crawl. Tools like Screaming Frog or the free Google Search Console report will flag any broken URLs or orphan pages.
Did you notice a drop in traffic to a new post? That could mean the internal link didn’t pass enough juice.
Key signals to track
Pages per session, more internal links usually lift this number.
Bounce rate, a well‑placed link keeps readers moving.
Crawl depth, aim for most important pages within two clicks from the homepage.
Refine your rules
If a rule creates awkward anchors, edit the CSV and re‑run the scan.
Watch the crawl report after each change. A clean report means the fix worked.
Tip: Keep the auto‑link count low. One or two links per post still give a strong signal.
Scale with confidence
Once you’ve tuned a few posts, apply the same rule set to new content batches.
Use the same monitoring checklist on a weekly basis. When the numbers stay steady, you can add more keyword‑URL pairs.
Imagine you’ve built a pillar on “email list growth.” Each month you add a fresh case study and let the automation link back to the pillar. The pillar’s authority grows, and the new post gets a boost right away.
For a deeper look at why internal linking matters to both search bots and AI, see this internal linking best practices guide.
| Metric | Tool | What to watch |
|---|---|---|
| Broken links | Screaming Frog | Any 404 or redirect loops |
| Page depth | Search Console | Pages >2 clicks from home |
| Engagement | Analytics | Pages per session & bounce |
As your site grows, repeat the audit every month. Pull a fresh crawl, compare the new pages’ depth, and add them to your rule file. Over time the rule set becomes a living map that scales with your blog.
When you see the engagement metrics hold steady, you can raise the auto‑link limit a bit. Just watch the bounce rate, if it climbs, pull back.
Stick to this loop, monitor, tweak, then grow, and your internal network will keep feeding itself.
Conclusion
You've seen how to automate internal linking for blog posts step by step. The idea is simple: let a tool find the right phrase, drop the link, and let search bots do their work.
When the rule file stays tight and you check the crawl each week, the link network grows without you lifting a finger. That steady flow keeps readers moving and helps Google see which pages matter most.
If you want a quick way to see the benefits, check out the guide on automated content engines for blog SEO. It breaks down why a clean internal web saves time and boosts rankings.
So, keep the loop simple: audit, set rules, watch the data, and add a link or two when you need more juice. Your blog will keep ranking higher while you focus on creating fresh content.
FAQ
What is internal linking automation?
Internal linking automation is a way for a tool to scan a new blog post, find phrases that match other pages on your site, and drop a link without you typing any HTML. The tool uses a list of keyword‑to‑URL pairs you set up, so each time you publish, the right anchor appears in the right spot. This saves you minutes on every draft and keeps the site’s link web tidy.
How do I set up the rule file for the automation?
First, make a spreadsheet with three columns: the keyword or phrase you want to link, the target page URL, and the exact anchor text. Export it as a CSV. Then import that file into the plugin or script you use. Keep the list short, one or two keywords per post, so the links feel natural and don’t overwhelm readers. Test on a draft before you go live.
Can I use this with any CMS?
Yes. Most popular platforms, WordPress, Webflow, Shopify, Wix, have plugins or API hooks that accept a CSV of rules. If your site runs on a custom CMS, a small Python script can read the same file and call the CMS’s API to insert the links after a post is saved. The key is that the tool can read the file and act on the content automatically.
How often should I review the automated links?
Check the link map at least once a month with a crawl tool like Screaming Frog or the free Search Console report. Look for broken URLs, orphan pages, or anchors that sound forced. If you add new pillar content, add its keywords to the rule file and run a quick scan on recent posts. A short review keeps the internal web healthy and avoids SEO penalties.
Will automation hurt my SEO if I add too many links?
Search engines expect a natural link pattern. If a post ends up with a handful of well‑placed links, it signals relevance. Adding a dozen auto‑links can look spammy and may raise the bounce rate. Keep the count low, usually one or two per article, and make sure each link adds real value to the reader. This balance lets bots follow the path without penalizing you.
Is there a way to combine internal linking automation with content creation?
Tools like Distribb can generate a full draft, then run the same rule file to sprinkle links before the post is published. The workflow looks like: keyword research → content outline → AI‑written article → auto‑link scan → publish. By tying the two steps together, you get fresh content and a tidy link structure in one smooth run.